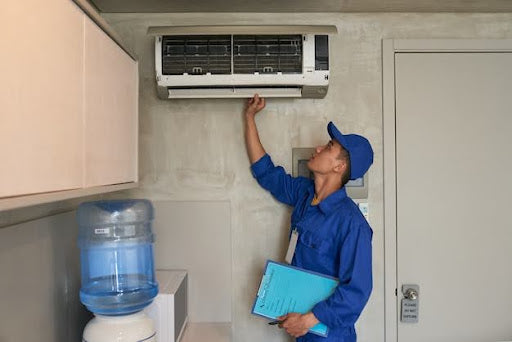
Wall-mounted air handlers are a sleek and efficient way to control indoor temperatures. They are ideal for homes and commercial spaces that want flexible climate control without the need for ductwork.
However, for these systems to perform at their best, correct installation is essential. An improperly mounted air handler can lead to inefficiency, noise issues, and long-term damage.
This guide walks you through the steps to mount a wall-mounted air handler the right way.
What You Need Before Starting
Tools and Equipment
Before you begin, gather these basic tools:
-
Mounting bracket (usually included with the unit)
-
Safety gear (gloves, safety goggles)
Having everything ready helps avoid delays and mistakes during installation.
Choose the Right Wall Location
Pick a spot that allows for good air circulation. Avoid corners or tight spaces where airflow can be restricted. Ideally, the air handler should be mounted at least six feet above the ground and a foot below the ceiling.
Make sure the wall can support the weight of the unit. Use a stud finder to locate solid mounting points within the wall. Drywall alone is not enough.
Step-by-Step Installation Process
Step 1: Mount the Backing Plate
The air handler comes with a metal mounting bracket or plate. Position this bracket on the wall where you plan to install the unit.
Use a level to ensure it is perfectly straight. Mark the screw hole positions on the wall, then pre-drill holes into the studs. Secure the bracket tightly using appropriate screws and anchors.
Step 2: Prepare the Wall Opening
The air handler requires a small hole for the refrigerant lines, drain hose, and electrical wiring to pass through to the outside unit.
Drill a 2.5 to 3-inch hole at a slight downward angle. This slope helps condensate drain properly without pooling. Use a sleeve or conduit to protect the lines and wiring as they pass through the wall.
Step 3: Connect the Line Set and Wiring
Run the refrigerant lines, electrical wires, and condensate drain hose through the hole. These lines connect the indoor unit to the outdoor condenser.
Carefully connect the lines according to the manufacturer’s instructions. Be sure to wrap the lines in insulation to prevent heat loss and condensation.
Do not kink or bend the refrigerant lines sharply. This can affect the efficiency of the unit.
Step 4: Mount the Air Handler on the Bracket
Once the lines are in place, lift the air handler and hook it onto the mounting bracket. You should feel a solid click or fit that holds the unit in place securely.
Double-check that the unit is level and not tilted forward or backward. A misaligned air handler can lead to drainage issues or excess vibration.
Step 5: Final Electrical and Refrigerant Connections
At this stage, a licensed HVAC technician should handle the refrigerant charge and final electrical hookup. This step requires specific tools and knowledge to meet safety and performance standards.
The technician will vacuum the lines, check for leaks, and charge the system with refrigerant if needed. Improper refrigerant levels can cause the system to underperform or even fail.
Step 6: Test the System
Once everything is connected, power on the system. Check the air handler’s fan and cooling operation. Ensure that air is flowing smoothly and quietly.
Also, verify that the condensate is draining properly and not leaking from the unit.
If you notice unusual sounds or weak airflow, double-check the mounting and connections before continuing to use.
Tips for a Smooth Installation
Avoid Direct Sunlight and Heat Sources
Mount the air handler away from direct sunlight or appliances that produce heat. This helps the temperature sensors function accurately.
Keep Maintenance Access in Mind
Leave enough space around the unit to remove filters and access components for maintenance. Tight spaces make servicing more difficult later on.
Use a Professional When Needed
While you can mount the air handler on the wall yourself, the refrigerant work must be completed by a licensed HVAC technician. This ensures the unit runs efficiently and complies with local codes.
Common Mistakes to Avoid
-
Not using a level
This results in a tilted air handler that drains poorly. -
Skipping wall reinforcement
If the wall cannot support the unit, it may sag or fall. -
Improperly insulated lines
This can lead to moisture buildup and energy loss. -
Wrong hole angle
A flat or upward-angled hole causes drainage issues and can lead to water damage.
Find the Best Wall-Mounted Air Handler at Voomi Supply
Whether you are upgrading an old unit or installing a new system, choosing a high-quality air handler makes all the difference.
Voomi Supply offers a wide selection of wall-mounted air handlers designed for reliable performance and modern aesthetics. Their collection features trusted brands and models suited for both residential and commercial needs.
Explore your options today and find the perfect fit for your space.


